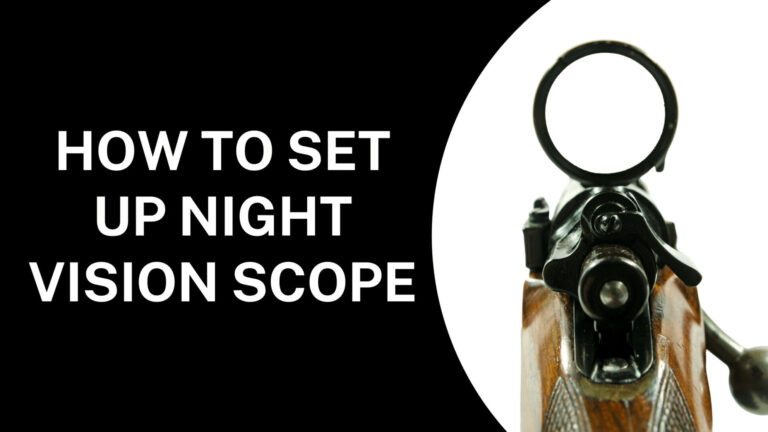
Mastering the Art of Sighting In: Tips for Night Vision Scope Users
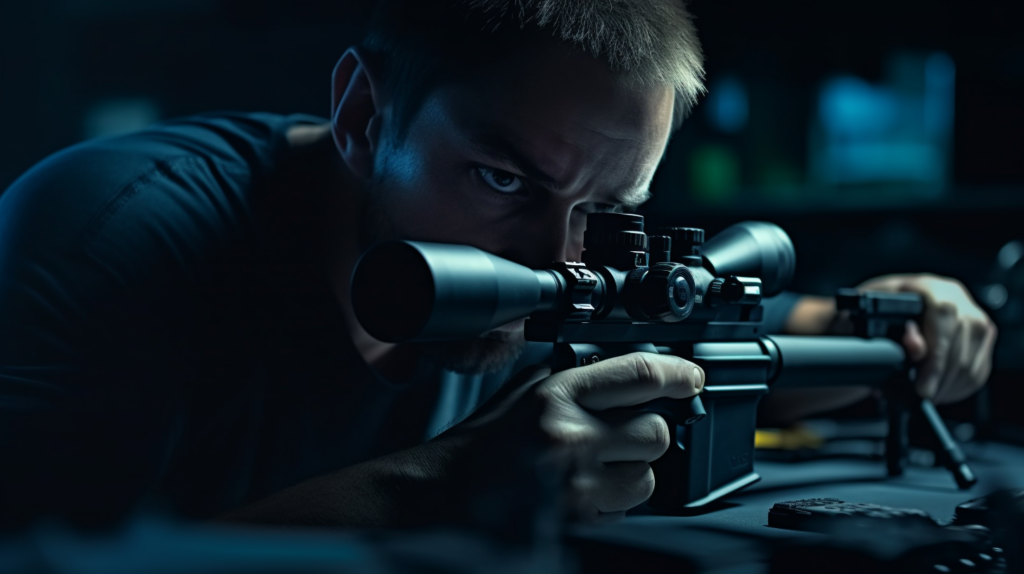
Sighting in a night vision scope is a critical process for achieving accuracy in low-light conditions. To sight in a night vision scope, it is essential to have a proper understanding of the optics and the right equipment for the job. This includes the right mount, a good rest for the rifle, and a quality night vision scope. In this article, we’ll discuss how to sight in a night vision scope and provide you with some tips for achieving optimal results.
Sight in a night vision scope can be daunting for the uninitiated. Sighting in a night vision scope is similar to sighting in a regular scope, but there are a few additional considerations to keep in mind. Here are the steps to sight in a night vision scope:
Method of How To Sight In a Night Vision Scope
1. Mount the scope
First, mount the scope on your firearm according to the manufacturer’s instructions. Ensure that the scope is securely mounted and aligned properly with the firearm.
Mounting the night vision scope properly is crucial for accurate sighting and safe use of the firearm. Here are the steps to mount the scope:
Proper mounting of the night vision scope is critical for accuracy and safety. If you’re unsure about how to mount the scope, seek advice from a professional or experienced shooter.
2. Choose the target
Choose a target at the desired distance and set up a safe and stable shooting position.
Choosing the target is an important step in sighting in a night vision scope. Here are some things to consider when choosing a target:
Once you have chosen a target, set up a safe and stable shooting position. This will ensure that you can aim accurately and safely. Use a rest or bipod to steady the firearm and aim at the center of the target. Fire a test shot and use a spotting scope or binoculars to see where the shot landed. This will help you make the necessary adjustments to zero in your night vision scope.
3. Adjust the reticle
Adjust the reticle so that it is visible in the night vision scope. Some scopes have adjustable brightness levels, so adjust it to a level that is visible but not too bright that it washes out the target.
Adjusting the windage and elevation turrets is necessary to zero in a night vision scope. Here are the steps to adjust the turrets:
Adjusting the windage and elevation turrets can be a time-consuming process, but it is essential for accurate sighting in a night vision scope. Keep track of the adjustments you make to the turrets, and use a consistent and repeatable method to ensure that your zero is accurate.
4. Fire a test shot
Fire a test shot at the center of the target. Use a spotting scope or binoculars to see where the shot landed.
Focusing the night vision scope is important for achieving a clear and sharp image. Here are the steps to focus on a night vision scope:
Focusing the night vision scope can be a simple process, but it is important to take the time to get it right. A clear and sharp image will help you aim accurately and identify targets in low-light conditions.
5. Make adjustments
Use the turrets or dials on the scope to make adjustments to the point of impact. Adjust the scope in the direction you want the point of impact to move. The amount of adjustment required will depend on the distance to the target and the size of the adjustment increments.
Using the reticle to aim accurately is an important step in sighting in a night vision scope. Here are the steps to use the reticle:
Using the reticle is essential for accurate aiming with a night vision scope. Take the time to familiarize yourself with the reticle and its markings, and practice using the reticle to aim at various distances and sizes of targets.
6. Fire another shot
Fire another shot and check where it landed. If it’s not on target, make additional adjustments and repeat until you have zeroed in your scope.
Zeroing a night vision scope is the process of aligning the reticle or crosshairs with the point of impact on the target. Achieving proper zero is critical for accuracy and consistency when shooting. After sighting in your night vision scope, it is important to make note of the settings and confirm the zero. Here are the steps to confirm the zero:
By confirming the zero and recording the settings, you will be able to quickly return your night vision scope to the zero position in the future. This is important for maintaining accuracy and consistency when using the night vision scope.
7. Record settings
Record settings: Once you have zeroed in your scope, record the settings for future reference.
The final step in sighting in a night vision scope is to test it in the field. Here are the steps to test your night vision scope in the field:
Testing your night vision scope in the field is important to ensure that it is working properly and to become familiar with its capabilities. Take the time to test your night vision scope in various lighting conditions and practice using it in the field to become a proficient user.
It’s essential to sight in your night vision scope before using it in the field, especially for hunting or other activities that require accuracy. Take your time and make sure the adjustments are correct before heading out into the field.
Experts Techniques About How to Sight in Night Vision Scope
Some shooters prefer to use a laser sight, while others use the reticle of the night vision scope itself. Many techniques can use to achieve an accurate sight picture, and the best way to find what works for you is to experiment.
One popular method is to use a laser sight in conjunction with the night vision scope. Aligning the laser with the target allows you to see where the bullet will hit without having to look through the scope. This can be helpful when trying to adjust for wind or elevation changes.
Another technique is to use the reticle of the night vision scope itself as a sighting aid. This involves adjusting the focus of the scope until the reticle appears clear and then aligning it with the target.
What Should you not do With Night Vision?
When you get a new set of night vision goggles, it is important to read the instruction booklet to find out how to use them properly. There are some things you should not do with night vision goggles, or they will not work properly. Here are some of the things you should not do:
FAQ
What distance should I sight in my night vision scope?
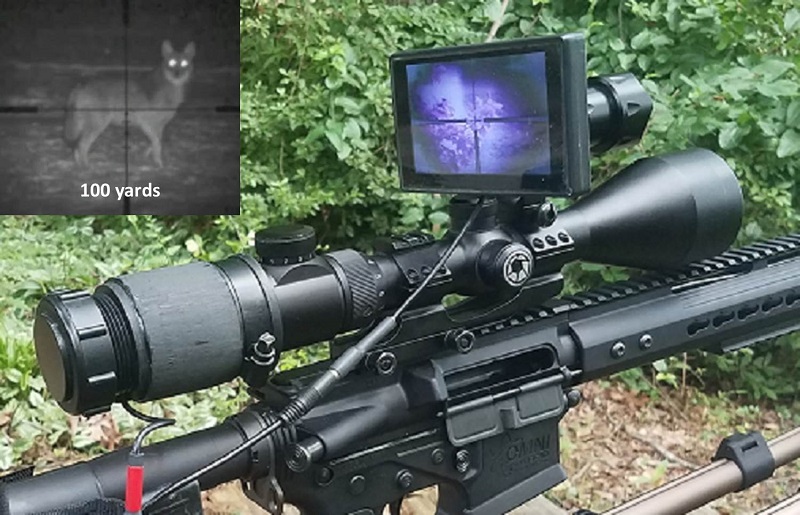
The distance at which you should sight in your night vision scope depends on the intended use of the rifle. If you plan to use the rifle for long-range shooting, then sighting in at a distance of 100 yards is recommended. For short-range shooting, sighting in at 25 or 50 yards may be sufficient.
Can you sight in a night vision scope during the day?
Yes, you can sight in a night vision scope during the day, but it is important to remember that the point of impact may differ from when shooting at night. However, it is recommended to do most of your sight-in shooting during the time of day or night when you intend to use the scope.
How do you adjust windage and elevation on a night vision scope?
Windage and elevation adjustments on a night vision scope are typically made using knobs or dials located on the top and side of the scope. Windage adjustments move the reticle left or right, while elevation adjustments move the reticle up or down. It is important to make small adjustments and take test shots to ensure the point of impact is moving in the desired direction.
What is the process for zeroing a night vision scope?
The process for zeroing a night vision scope is the same as with any other scope. Start by setting up a target at your desired distance, then take a few shots to determine the point of impact. Adjust the scope’s windage and elevation settings until the point of impact matches the point of aim. Repeat this process until the rifle is accurately sighted in.
How long does it take to sight in a night vision scope?
The time it takes to sight in a night vision scope can vary depending on the shooter’s experience and the quality of the scope. It may take anywhere from a few minutes to an hour or more to get the rifle accurately sighted in.
What is the best way to sight in a night vision scope?
The best way to sight in a night vision scope is to take your time and make small adjustments to the scope’s windage and elevation settings. It is also important to use a stable shooting platform and take test shots after each adjustment to ensure you are on target.
How often do you need to sight in a night vision scope?
The frequency at which you need to sight in a night vision scope depends on various factors, including the quality of the scope and the conditions in which it is used. Generally, it is recommended to sight in a rifle and scope combination at least once a year, or more frequently if it is used often or experiences rough handling.
Can you sight in a night vision scope without shooting?
Yes, it is possible to sight in a night vision scope without shooting by using a bore sighter or laser boresight. These tools allow you to align the scope with the barrel without firing any shots, which can save time and ammunition.
What is the best type of target to use when sighting in a night vision scope?
The best type of target to use when sighting in a night vision scope is one that provides a clear and visible point of aim, such as a paper target with a black bullseye. It is also important to use a target that is appropriate for the distance at which you are sighting in the scope.
Summary
Sighting in a night vision scope is a relatively simple process that can be accomplished with a few basic tools. By following the steps outlined in this article, you should be able to achieve accurate results and get the most out of your night vision scope.